Remarkable 12 Weeks of Christmas Ideas with Stampin’ Up! #07
Hello and welcome to Mitosu Crafts UK, thanks for stopping by. It’s Barry & Jay Soriano here sharing the #07 of #40 12 Weeks of Christmas papercraft ideas designed by the Crafty Collaborations team!

12 Weeks of Christmas Ideas #07
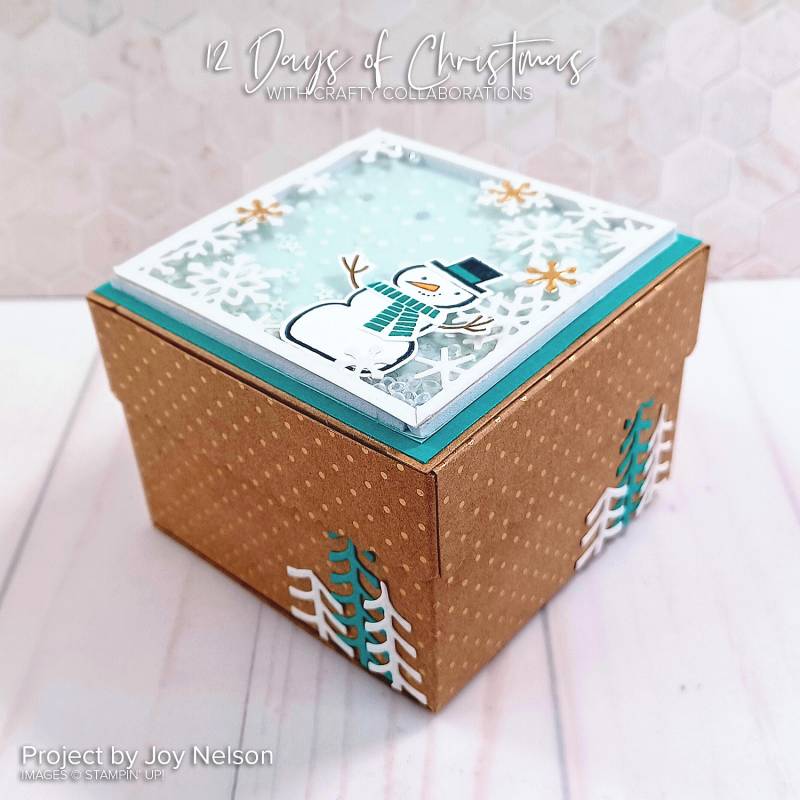
This interactive gift box is so much fun with the shaker lid. Designed by Joy Nelson using the Snowman Magic Bundle and Scalloped Kraft Treat Boxes.
Snowman Magic Box Top Shaker
Measurements
- Snowy White Velvet Sheets = 3 ¼ x 4 ½ in (8.2 x 11-4 cm) **
- Bermuda Bay cardstock = 3 ½ x 3 ½ in (8.9 x 8.9 cm) **
- Gold Foil = scrap for 3 small snowflake die cuts **
- Pool Party cardstock = 3 ¼ x 3 ¼ in (8.4 x 8.4 cm)
- Snowflake Specialty Vellum = 3 ¼ x 3 ¼ in (8.4 x 8.4 cm)
- Window Sheets = 3 ¼ x 3 ¼ in (8.4 x 8.4 cm)
- Basic White Thick cardstock = scrap approximately 3 x 3 in (7.5 x 7.5 cm)
**Adhesive Sheets cut to match
12 Weeks of Christmas Ideas #07 Tutorial
- Attach a matching sized amount of Adhesive Sheet to the back of the Snowy White Velvet Sheet sized at 3 ¼ x 4 ½ in (8.2 x 11-4 cm), the Bermuda Bay cardstock sized at 3 ½ x 3 ½ in (8.9 x 8.9 cm), and the Gold Foil scrap piece which is big enough to die cut 3 small snowflakes. (Alternatively, a fine-tipped glue pen, instead of adhesive sheets can be used at the later step when attaching).
- Die cut one of the “snowflake frame” out of the (adhesive backed) Snowy White Velvet Sheet. Then die cut 4 of the “pine tree” out of the left over Snowy White Velvet Sheet that is the middle of the “frame.” Set all of the Snowy White Velvet Sheet die cut pieces aside.
- Die cut 4 of the “pine tree” out of the (adhesive backed) Bermuda Bay cardstock and set aside.
- Die cut 3 of the “small snowflake” out of the (adhesive backed) Gold Foil scrap piece and set aside.
- Cut the “snowflake frame” at opposite corners (at an angle) and trim some of the snowflakes on the frame so that it looks good when you reduce the size of the frame to fit the 3 ¼ x 3 ¼ in (8.4 x 8.4 cm) Window Sheet. (See companion video. Link included with this tutorial).
- Attach the “snowflake frame” to the 3 ¼ x 3 ¼ in (8.4 x 8.4 cm) Window Sheet making sure to match the edges precisely. Trim off the excess parts of the frame.
- Use the scrap piece of Basic White Thick cardstock sized at approximately 3 x 3 in (7.5 x 7.5 cm) to stamp the following images. Stamp the “snowman body” and “top hat” images using Tuxedo Black Memento ink. Stamp the “scarf” image using Bermuda Bay ink. Stamp the “stick limbs” images using Soft Suede ink.
- Die cut the above stamped images with the coordinating Snowman Dies.
- Attach the “stick limbs” to the “snowman body” using Multipurpose Liquid glue.
- Attach the “scarf” to the “snowman body” using Multipurpose Liquid glue.
- Use a Bermuda Bay Stampin’ Write marker to color the band on the “top hat” stamped image.
- Attach the “top hat” to the “snowman body” using Multipurpose Liquid glue.
- Attach the finished snowman to the snowflake framed window sheet using Multipurpose Liquid glue.
- Attach the 3 ¼ x 3 ¼ in (8.4 x 8.4 cm) Snowflake Specialty Vellum piece to the 3 ¼ x 3 ¼ in (8.4 x 8.4 cm) Pool Party cardstock piece. Be sure to use a thin bead of the Multipurpose Liquid glue only around the outside edge.
- Attach Foam Adhesive Strips around the outside edge of the combined Snowflake Specialty Vellum and Pool Party cardstock piece to form a box.
- Sprinkle enough of the Sparkle & Shine Sequins to give your project a good shaker element onto the middle of the combined Snowflake Specialty Vellum and Pool Party cardstock piece. (Only do this after you have attached the Foam Adhesive Strips that will form side walls).
- Remove the paper on the top side of the Foam Adhesive Strips and then attach the snowflake framed window. (See companion video for a good tip on how to do this easily and precisely. Link included with this tutorial).
- Use Multipurpose Liquid glue to attach the completed shaker box to the 3 ½ x 3 ½ in (8.9 x 8.9 cm) piece of Bermuda Bay cardstock.
- Attach the 3 Gold Foil die cut “small snowflakes” to the front of the combined shaker box as shown in the picture of the top view shown in this tutorial. Fold along the score lines of the top and bottom of the Scalloped Kraft Treat Box (do not put box together yet).
- Attach the combined shaker box and Bermuda Bay cardstock to the top piece of the Scalloped Kraft Treat Box before putting the top of the box together. Match the bottom of your shaker box to the crease at the top of the curved edge flap.
- Put together the top of the Scalloped Kraft Treat Box.
- Trim off the bottom of the Bermuda Bay cardstock “pine trees” so that most of the entire tree shows when the lid is on the box. (See picture of the side view in this tutorial).
- Attach the Bermuda Bay trees to the bottom of the Scalloped Kraft Treat Box before putting the bottom of the box together. (See companion video for reference. Link included with this tutorial). Double check to make sure the bottom of the trees will be at the bottom of the box when put together.
- Cut apart the Snowy White Velvet “pine trees” in 2 pieces to create 2 trees out of each die cut “pine tree.” Do this at the point where the bottom three branches will create a new tree. Trim the top and bottom of this second tree piece as shown in the picture of the side view shown in this tutorial.
- Attach the Snowy White Velvet trees next to the Bermuda Bay trees (one on each side) on the bottom of the Scalloped Kraft Treat Box before putting the bottom of the box together.
- Put together your decorated Scalloped Kraft Treat Box bottom. Put completed shaker top onto your box. Now you have a completed box with a shaker top!
Stampin’ Up! Craft Supplies
You can purchase any current Stampin Up card making and paper craft products from Mitosu Crafts. Available to residents of the UK, France, Germany, The Netherlands, Austria, Belgium & Ireland via our online shop by clicking the images below or contacting us direct either via email or phone.
Customer in the Netherlands can now shop with us easily by using Paypal.
Product List")

 Velvet Sheets")
 Specialty Vellum")


We hope you enjoyed this papercraft idea and our 12 Weeks of Christmas countdown for 2022. Thanks again for stopping by. Until next time, BYEEEEE!


Basic Craft Kit


Current Host Code

Grab your cardmaking & papercraft Stampin’ Up! supplies HERE to receive the Global Creative Project and Crafty Collaborations Tutorial Bundles as extra thank you gift from us when you place a £50 order or more
Order Stampin’ Up! Craft Supplies from Mitosu Crafts Online Shop HERE
If you are placing an order for £150 and above, do not use the host code so you can get the reward for yourself. Definitely, think about joining Stampin Up and our Mitosu Stampurrrs team beforehand though. More info can be found on the JOIN OUR TEAM page HERE
Supporting Mitosu Crafts

We are a small independent business and would really appreciate your support. You can do this by sharing our projects from our Blog, Facebook Page and Youtube Channel to any Social Media platforms
Don’t live in any of our shopping countries but would still like to support us? You still can by donating HERE to help us continue bringing you more content, video tutorials and inspirations. Please make sure you leave your contact details so we can send you a Thank You card (anywhere in the world)
STAMPIN’ UP! ONLINE EXCLUSIVES
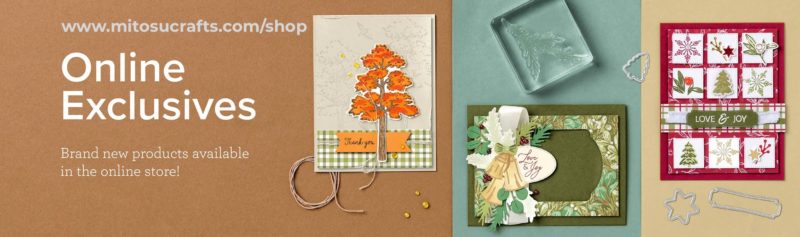
Add spark to your creativity and expand your craft collection with these on trend, Christmas in July Online Exclusives, you won’t find these products in any catalogue
Shop Stampin’ Up! Online Exclusives HERE
SHOP STAMPIN’ UP! CARDMAKING & PAPERCRAFT SUPPLIES
FREE Card Making PDF & Video Tutorial Bundles


Get more card making ideas and papercraft inspirations from the Global Creative Project (VIDEO & PDF) and Crafty Collaborations (PDF) Tutorial Bundles. Earn for FREE when you place a £50 order from our online shop using our current Stampin’ Reward Code (tutorial bundle will be emailed the following month you place a qualifying order). Or purchase previous theme tutorials HERE
Mitosu Crafts by Barry and Jay Soriano, Independent Stampin Up Demonstrator in UK for Card Making Ideas, Paper Craft Inspirations, Classes and Online Shop
Your Independent Stampin’ Up!® Demonstrators, Basingstoke
UK | France | Germany | Austria | Netherlands | Belgium | Ireland
Card Making Ideas and Paper Craft Creative Coaches
Card Classes | Video Tutorials | Online Shop
~Thank You~

You May Also Like
Remarkable 12 Weeks of Christmas Ideas with Stampin’ Up! #30
Remarkable 12 Weeks of Christmas Ideas with Stampin’ Up! #05