#onstage2019 Telford 3D Swap
Hello, it’s Jay here sharing our #onstage2019 3D swap for the Stampin’ Up! event at Telford UK. Stampin’ Up! holds this event bi-annually and is exclusive to demonstrators across the world
We have the opportunity to see and play with new products as well as get our hands on the upcoming annual catalogue for 2019-2020! Not only that, the best thing is seeing other demonstrators and get inspired with their creations via their swap. It’s such a wonderful experience and if you would like to know more on how you too can attend the Stampin’ Up! OnStage event then contact us today
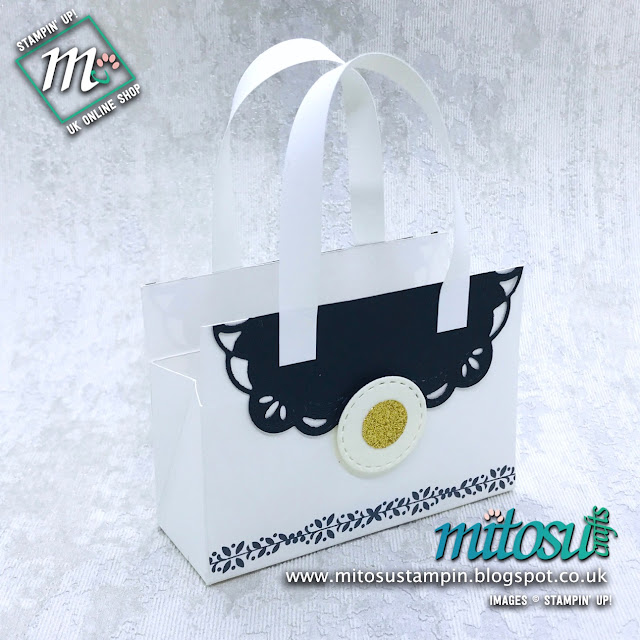
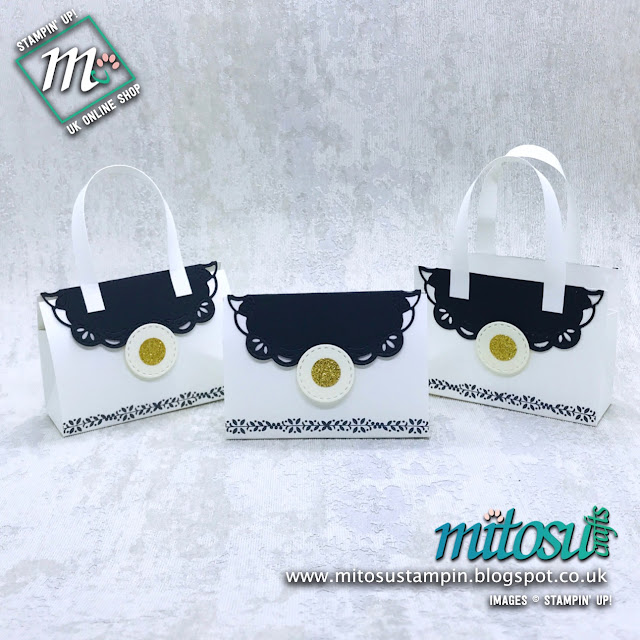
I have been seeing lately the fashion trend of a mini bag and wanted to create one for our swap. The first prototype version is shown below
The fold is actually inspired from Barry’s Fold Flat Gift Box (HERE) which we also created in our cardmaking and papercraft class last week. So then I thought, why not make it into a fold flat mini gift bag!
It’s the same measurements as the first one and uses the same products. I used the Stitched All Around Stamp Set and Stitched Labels Framelits Dies BUNDLE. This Bundle is currently available only until end of May and you can SAVE 10% off on both products when you order
I added one strip of cardstock for the ‘handle’ as well as a way to open the bag. Some swaps, I also punched the corner using the Trio Punch but most ended up with a squared edge
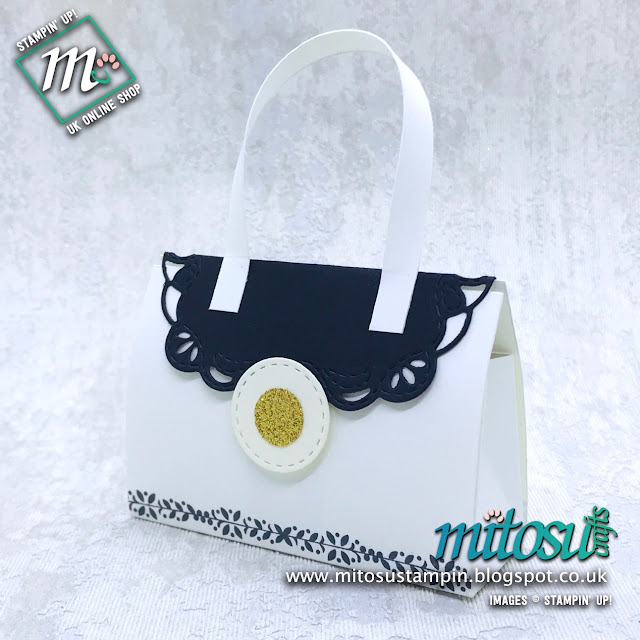
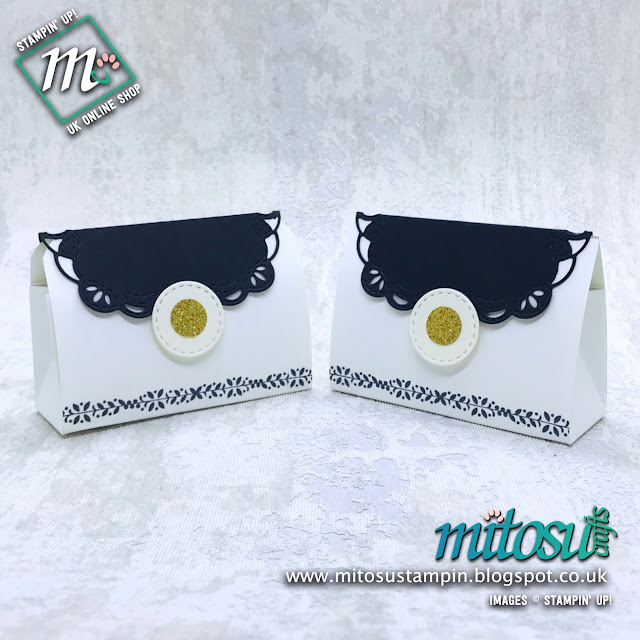
As the event was drawing near and we had other swaps to do, I omitted the handle and it became a fold flat mini clutch bag 🙂 Again with the same design and measurements. The width was decided from the label die cut for the top/lid and because I am a frugal crafter. I wanted 2 bags per 1 A4 cardstock or US Letter size card
I will upload a video next week so for now here are some brief information
Measurements
Whisper White Body 6 1/4″ x 3 1/2″ , scored at 2 1/2″ and 3 3/4″
Whisper White Sides (x2) 4″ x 2″, scored at 1 3/8″ and 2 5/8″, mark at 2″
Turn 90˚, score at 1/4″
Turn 180˚, mark at 3/8″ top and bottom
You will need to add diagonal lines on the side panels and cut off the 2 outer 1/4″ edges. This will leave you with a 1/4″ tab in the middle to be stuck on the ‘body’
Directions
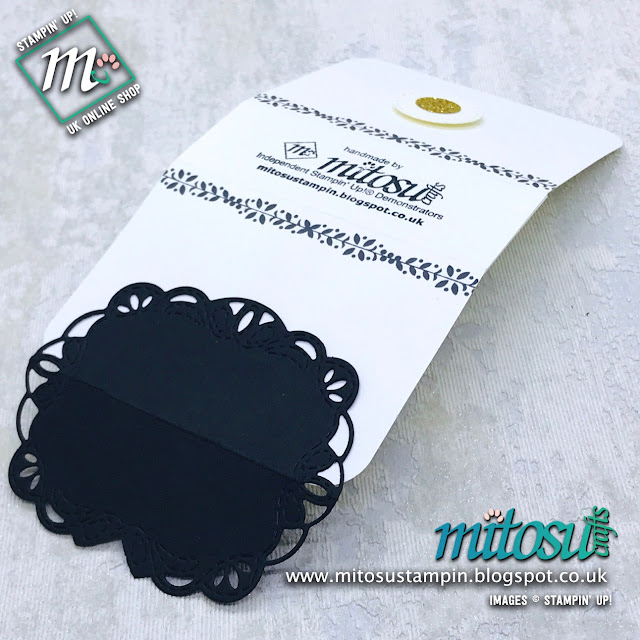
Die cut the label design in Basic Black and score across the middle. Snip into the design as shown on pic 1
Die cut the circle stitched design in Very Vanilla, punch Gold Glimmer Paper with 1/2″ Circle Punch and adhere on top
Stamp the border design on the ‘Body’ with Tuxedo Black, using a Stamparatus if needed
Burnish folds and adhere both of the sides
Add the black label die cut, only gluing the on the back and the cut out design at the front
Fold the lid over to gauge where to put dimensionals
Add the Very Vanilla and Gold ‘button’
Aren’t they cute and which one of these do you prefer? Come back soon for our #onstage2019 card swap and for a video tutorial of this Mini Treat Bag
Thanks again for stopping by. Until next time, BYEEEEE!

Would you like FREE PDF Tutorials?
Get more cardmaking ideas and papercraft inspirations when you order from Mitosu Crafts UK with the brand new and exclusive project tutorials designed by the Stampin’ Glam Squad ~ FREE with a £46 product order or when you join our Stampin’ Up! team. Or simply purchase the Tutorial Bundle for £15
We hope that you enjoy our projects. If you like the products we have used, you can order current Stampin’ Up!® products and craft supplies with Mitosu Crafts via our UK Online Shop 24/7
Stampin’ Reward Code
It means a lot for your continued support so please use our current Stampin’ Reward Code located on the top right of our blog for orders between £20 to £150. If you place an order for £150 and above, do not use the reward code so you can get the reward for yourself

Independent Stampin’ Up!® Demonstrators, Basingstoke Hampshire
UK | France | Germany | Austria | Netherlands
Cardmaking and Papercraft Creative Coaches
Craft Inspirations | Card Classes | Online Shop
~Thank You~


